
How to get there
- Choose the Chord tool
 . The Chord menu appears.
 - Choose Chord > Manual Input.
- Double-click a note (if it already has a
 handleA small square which appears on currently "selectable" elements in the score. Handles allow you to select, edit and adjust musical elements in the score., double-click the handle). The Chord Definition dialog box appears.
 - Click Show Advanced to expand the Chord Definition dialog box.
- If the Suffix ID is a number other than zero, click Edit. If the Suffix ID is zero, click Select to open the Chord Suffix Selection dialog box and click Edit. The Chord Suffix Editor dialog box appears.
- Click Set Play.
What it does
In this dialog box, you can define the voicing you want Finale to use when it plays the chord suffix you clicked. Each note of the chord is identified by a number that represents its interval, in half steps, from the root; this number is called the keynumber offset. Either enter each keynumber offset in a text box and click the right and left arrows to scroll the display or click Listen and play the chord in whatever voicing you prefer (see Listen dialog box); you can build a suffix of up to sixteen notes. A negative number specifies a note that’s been played below the root of the chord, and a positive number specifies one above.
Every time Finale encounters a chord symbol with that suffix in playback, it will use the voicing you specified. Because the notes of the playback definition you’re creating are measured from the root, a given suffix always plays correctly, no matter what the root of the chord—in other words, a minor ninth will always sound like a minor ninth.
This dialog box is also where Finale stores its knowledge of chord symbols; when you play a Cm7, Finale consults the information in this dialog box to decide which chord symbol to display (when you’re using one of its automatic-chord input features). Technically, you could edit Finale’s associations of chord suffix to a group of notes (and their intervals from the root) in this dialog box, so that Finale would display Csus4 when you played a Cm9, for example. However, if your aim is to teach Finale to recognize unusual or complex chords, you’ll find Finale’s learned chords feature to be a far more convenient method.
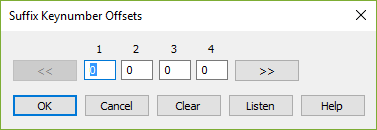
- << 1 • 2 • 3 • 4 • ... >>. Use the arrows to scroll through the series of sixteen keynumber offset values displayed.
- OK
- Clear. Click Clear to set all the text boxes to zeros, removing the chord’s playback definition.
- Listen. Instead of typing in half-step values, you can enter the appropriate numbers in all of the text boxes at once by playing the complete chord on your MIDI keyboard. Click Listen; Finale displays a message asking you first to play the root of the chord, so it will have a point of reference from which to compute the keynumber offsets. Next, Finale prompts you to play the suffix itself (without the root). Finale enters the appropriate numbers in the text boxes. Remember that even though you just played a specific root and suffix voicing, Finale remembers this suffix voicing no matter what its root—so, for example, you can define all your major seventh chords at once.
See also:

