
How to get there
After a mid-measure clef change has been created, choose the Clef tool  and
and ![]() handleA small square which appears on currently "selectable" elements in the score. Handles allow you to select, edit and adjust musical elements in the score.. Or, select the handle of the mid-measure clef and press Enter.
handleA small square which appears on currently "selectable" elements in the score. Handles allow you to select, edit and adjust musical elements in the score.. Or, select the handle of the mid-measure clef and press Enter.
What it does
Noteman says: To convert a mid-measure clef to a standard clef change (before the barline), click and drag it across the left barline.
A mid-measure clef can be placed anywhere in a measure—you can even drag it back and forth among the notes of the measure to see which placement would be easiest for the player to sightread. As you drag the clef, the notes before and after it re-notate themselves accordingly. You can have more than one mid-measure clef in a measure; in fact, another mid-measure clef appears each time you double-click a measure in which one already appears.
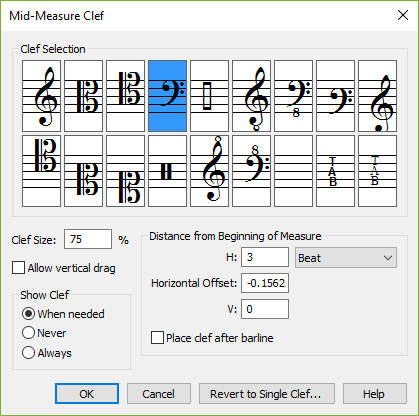
After placing a mid-measure clef, you can access this dialog box to change the clef, choose its size, and specify its placement.
- Clef Selection. Use these icons to select a clef. Each Finale document offers eighteen clefs, which you can edit or rearrange with the Clef Designer dialog box.
- Clef Size ___%. Use this field to enter the size of the new clef as a percent of full size. The reduced size (expressed as a percentage of full size) is set globally in the Document Options - Clefs dialog box.
- Allow
- Show Clef: When
Tip: Use Never at the end of a first ending repeat to set the clef for the second ending without displaying it. See Repeats (barlines and text indications).
- Distance
Click Place
- OK
- Revert to Single Clef. Click this button to turn a mid-measure clef change to a single clef (a clef that appears just before the barline and affects a full measure at a time) using the Change Clef dialog box.
Tip: Choose Apply Note Spacing to Current Part/Score to avoid collision of clef changes.
See also:

