If you’re interested in notating a performance
that’s currently stored in a hardware or software sequencer, you have
several options. If your sequence is stored in a sequencing program (software),
you can usually transfer it to Finale by saving it as a standard MIDI
file; read your sequencer’s instructions, then see To
import a MIDI file for instruction on converting a MIDI file
to standard notation.
If the sequence is stored in a physical
(hardware) sequencer, or if you have a second computer equipped with its
own MIDI interface, you can plug the sequencer (or extra computer) into
your computer and play the sequence into the Transcription Mode window.
As far as Finale is concerned, the MIDI signals it’s receiving in this
way are no different from the ones you produce when you play your synthesizer.
The Transcription Mode can record tracks simultaneously from as many MIDI
channels as you like, and then transcribe up to four channels at a time.
- Create the empty score, including meter, key
signature, and staff configuration. You can transcribe onto one
or two staves at a time.
- Click the HyperScribe tool
 .The HyperScribe menu appears.
- Choose HyperScribe > Transcription Mode. Click the measure at which the transcription will begin. You
enter the Transcription window. If the sequence is capable of providing
a MIDI “click track,” or if you can add a separate track consisting solely
of quarter-note (or some other value) “clicks” on a single pitch, you’ll
save time in the long run, because Finale will be learning where the beats
fall at the same time as it’s hearing the music. If your sequence does
not contain a click track, skip to the instruction marked by the asterisk
(*).
- Choose Time Tag > Click Input.
Specify the incoming MIDI signal that will serve as the click. The
easiest way to enter the click description is to click Listen, and then
play the click itself. Note that
if the click itself is to be a pitch, make sure it’s either a very high
or very low pitch—one that won’t be mistaken for a note in your sequence.
- Click Ignore First Data Byte (so that it’s
no longer selected). This checkbox essentially tells Finale whether
or not it should be particular about the MIDI signal it’s interpreting
as Time Tag information—in other words, whether or not to consider any
key (or controller) to be a Time Tag. You don’t want this option selected,
because you’re going to record both Time Tags and keyboard notes simultaneously.
- Click OK (or press ENTER).
If the clicks will be “tapping” any duration other than a quarter
note, be sure to let Finale know by choosing the correct duration value
from the First Tag is submenu of the Time Tag menu.
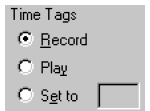
- Click Record under the words Time Tag. If
the sequence won’t be providing a click track, leave Play selected under
the words Time Tag; you can add the Time Tags separately after you’ve
recorded the sequence.
- Click Wait Till. Finale is now in “pause”
mode, where it will remain until it receives the first MIDI signal from
the external sequencer.
- Play the sequence. Click anywhere (except on
a button) to stop recording. When you stop recording, you’ll see
your music expressed as a sort of scrolling horizontal bar graph; the
lengths of the bars indicate the durations of the notes, and their position
in relation to the piano keyboard (left side of the screen) indicates
their pitch. If you recorded the
Time Tags (“click track”) as the sequence played, you’ll also see note
icons at the top of the screen, indicating the placement of the beats.
- To play your performance back, choose Edit > Select
All; under the word Keyboard, click Play; then click
Start. You hear the sequence played back. Note that Finale records
the MIDI channel information from the sequence, too; when it plays back,
it will transmit the MIDI signals over the same channels on which they
were received. Keep this in mind
if you’re having trouble hearing all the tracks in the sequence when you
play it back.
- If the sequence didn’t contain a click track,
add Time Tags. See To
transcribe a sequence.
- Select the MIDI channel and pitch information
to be transcribed by choosing Transcription Filter from the Transcription
menu. The Transcription Filter dialog box appears, in which you
can specify the range of notes within each MIDI channel you want transcribed.
For example, if your sequence contained
tracks recorded on several different MIDI channels, you can now transcribe
them onto individual staves, one at a time; if the flute and clarinet
were both on channel 2, for example, enter 2 in the first MIDI channel
text box. Then, to make sure you only transcribe the flute part, enter
the highest and lowest notes of the flute’s register in the Key Range:
High and Low text boxes. (To enter this information by playing it, click
Listen; play the lowest note, and then the highest note of the range you
want to specify.)
You can also use this high note/low note
filter in reverse. If, for example, you specify a Low note that’s higher
than the High note, you’ll have defined a range of notes you want to omit
from the transcription; only notes lower or higher than the specified
range will be transcribed.
- Click Use Filters. You’ve just told
Finale, in terms of MIDI channel and range of notes, what it should extract
from the complete sequence for notation onto its own staff. When you’re
finished transcribing this element, you can return to the Transcription
window, choose Transcription Filter again, and specify the next MIDI
channel setting to extract the next “track” out of the sequence, and so
on, until you’ve filtered out each individual “track” from the sequence.
- Choose Time Tag > Assign Measure Tags. For each downbeat, Finale automatically puts a tiny M above
the other Time Tags in the Time Tag display area, according to the time
signatures in the score itself.
- If you’re transcribing onto two staves, choose Transcription > Split Point > Fixed or Moving. If you choose Fixed, a dialog box appears. Enter the number
of a synthesizer key whose pitch you want to designate as the dividing
point between upper staff (usually treble clef) notes and lower staff
(usually bass clef) notes. (Or,
if you prefer, click Listen and play the key.)
If you choose Moving, Finale will split
a two-handed performance onto the correct staves (treble clef or bass
clef) by tracking the positions of your hands as they move up and down
the keyboard. Enter (or, by clicking Listen, play the interval of) the
largest hand span (in half steps) that occurs in the sequence. As long
as there’s a discernible gap between your two hands, Finale can track
a changing split point automatically. Click OK to exit either Split dialog
box.
- Click Transcription > Quant Settings.
The Quantization Settings dialog box appears.
- Choose a smallest note value and type of quantization.
Choose the smallest predominant note value in the piece. Select either
Mixed Rhythms, Space Evenly (for a swing feel) or No Tuplets. See Quantization Settings dialog
box for more information.
- Click More Settings. The More Quantization
Settings dialog box appears.
- If you like, click Key Velocities, Note Durations.
- Click OK twice.
- If you like, click Save Continuous Data, and
Save Tempo Changes. When the dialog box appears (when you click
Save Tempo Changes), press ENTER.
These four options tell Finale to remember
the precise feel of the original performance, and to keep this data handy
for playback when you dismiss the dialog box. If you don’t choose these
options, then when you play back the transcribed music from the score,
Finale will simply play back the sheet music—mechanically reproducing
the notes, but without expression or feeling—instead of an exact re-creation
of your original performance.
- Click the Transcribe button. If the
results aren’t perfect, remember that your performance is still intact,
in the Transcription window. Click the first measure of the transcribed
notation to switch back into the Transcription Mode, where you can correct
any split point or quantization settings; then click Transcribe again.
If you still don’t get good results and
you can’t figure out what’s wrong, read the Quantization
Settings Guide. If you discover occasional split-point
errors in the transcription (where a right-hand note was notated on the
left-hand staff, for example), see To correct split point errors.
