
How to get there
- Choose the Page Layout tool
 . The Page Layout menu appears.
 - Choose Page Layout > Page Size.
What it does
Noteman says: Before printing using a custom page size, make sure that the margins are set appropriately in the Page Format for Score dialog box and the Page Format for Parts dialog box. Visit the Finale Knowledge Base for further troubleshooting steps.
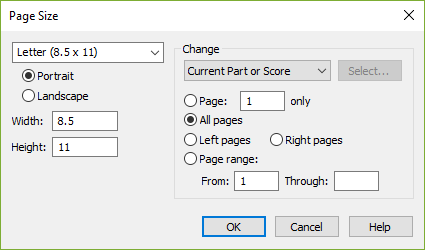
Use this dialog box to change the size or orientation of the specified pages.
 PortraitA positioning of the printed page so that it is taller than it is wide. or LandscapeA positioning of the printed page so that it is that is wider than it is tall. to orient the page.
- Change: Current Part or Score • Selected Parts/Score • All Parts • All Parts and Score • Select. Choose Current Part or Score to apply changes to the score or part that is currently active in the document window. Choose Selected Parts/Score and click Select to open the Select Parts/Score dialog box where you can choose to apply changes to any combination of the score and/or parts. Choose All Parts to apply changes to all parts and All Parts and Score to apply changes to the full project.
- Change: Page __
- OK
See also:

