
How to get there
- Choose the Measure tool
 .
. - Select a multimeasure rest in Page View, then choose Edit > Multimeasure Rests > Edit.
Or,
- Choose the Selection tool
 .
. - Right
- From the contextual menu, choose Multimeasure Rests > Edit.
Or,
- Choose the Staff tool
 .
. - In Scroll View, select one or more staff handles.
- Choose Document > Special Part Extraction.
What it does
Noteman says: If you find that your selected measurement unit is too large or small to work with, you can override your global choice by including the units or abbreviation when entering values. Or, you can set the default measurement units used in this dialog box by choosing
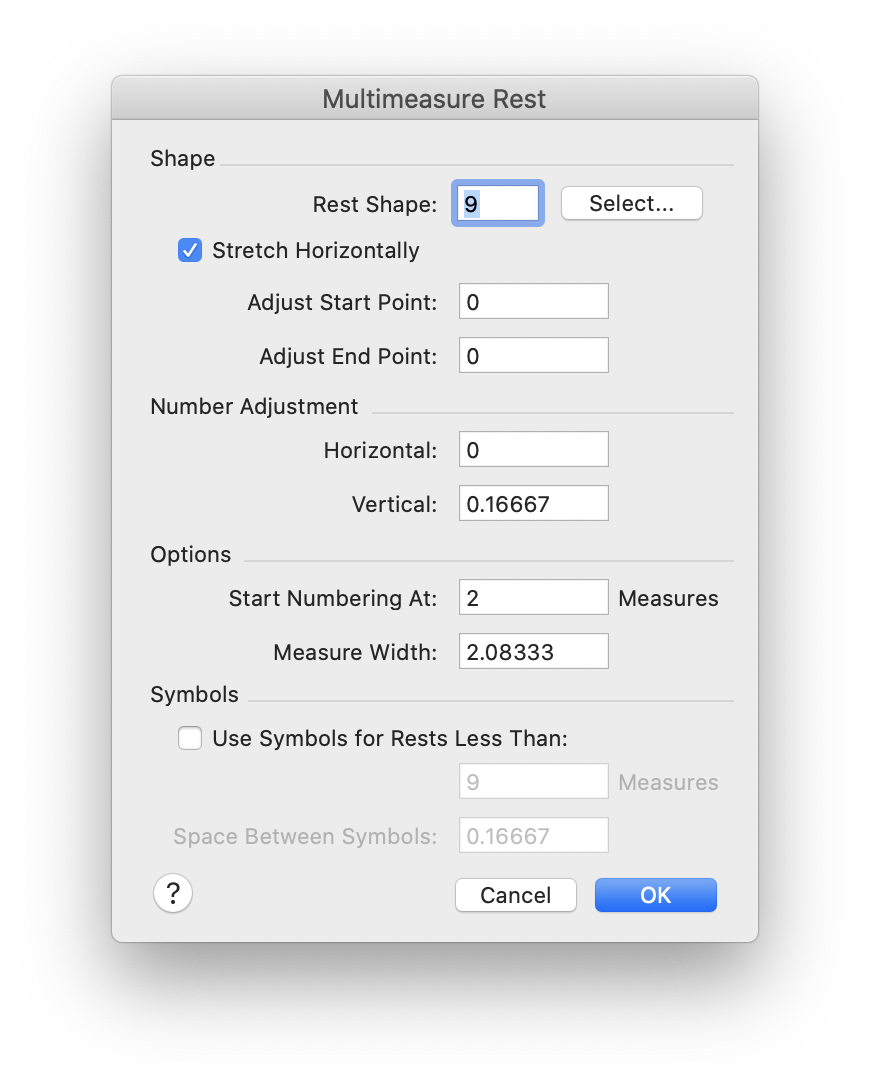
Use the Multimeasure Rest dialog box to define how Finale displays an existing multimeasure rest. These settings are almost identical to those in Document Options - Multimeasure Rest dialog box. You can choose between using a shape or Finale’s alternate style of notation for multimeasure rests. The alternate method combines whole and double-whole rests to represent block rests of different lengths, commonly those of eight or fewer measures.
- Shape: Select. Click Select to choose an existing rest shape from the Shape Selection dialog box. Create a new rest figure by clicking Create in the Shape Selection dialog box. The Shape Designer dialog box appears. The shape for the multimeasure rest itself is identified by the number in the text box next to the Select button.
- Stretch Horizontally. Check this box to stretch multimeasure rest symbols from their center point to fit the width of the measure. Uncheck this box to leave the multimeasure rest symbol at its default size and location, regardless of the measure's size.
- Shape: Adjust Start Point • Adjust End Point. Use these values to adjust the start and end points of the shape used for the multimeasure rest. Changing these values lengthens or shortens the shape. You usually won’t need to change these settings, but you may find them useful if you have a cautionary clef sign that appears in the multimeasure rest grouping. Enter positive values to shift the shape’s start or end point to the right; enter negative values to shift the start or end point to the left.
- Number Adjustment: H: • V:. Use these values to set the horizontal and vertical position of the rest number. Enter a positive value in H: to move the number to the right. Enter a positive value in V: to raise the rest number higher on the staff.
- Options: Starting Numbering At ___ Measures. Use this field to define when a number is displayed above a multimeasure rest section in your document.
- Options: Measure Width. Use this field to change how much space the multimeasure rest takes up.
- Use
- Space Between Symbols. This option appears when Use
See also:

