
Use the Staff tool  and the Group Attributes dialog box to draw barlines and set alternate barlines (instead of the barline style selected in the Measure Attributes dialog box) for groups. Use the Measure tool
  to set the barlines for staves, and to override the group barline setting.
Working with barlines individually
- Choose the Measure tool and double-click the handle of the barline you want to change. The Measure Attributes dialog box appears.
- Click the desired barline type.
When you select any unusual barline type, Finale automatically selects Break Multimeasure Rests so that, when you extract parts, the special barline will break a multimeasure rest (or “block rest”) into two block rests, one on each side of it. Such block rests automatically break for key and time changes, clef changes, and so on.
- Click OK.
- Choose the Measure tool and double-click top handle of the barline you want to hide (there may be more than one handle). You’re about to hide the right-hand barline.
- Click the invisible barline type.
- Click OK.
- Choose the Measure tool . A handle appears on each barline.
- Drag the top handle of the desired barline horizontally (there may be more than one handle). The measure becomes wider or narrower.
If you move a barline in Page View, you don’t just change the width of the measure whose right barline you drag; you also increase or decrease the width of the measure to its right, making this a useful technique for touching up your page layout. You can adjust all measures in a system except the last one with this method.
- Choose Document > Document Options and select Barlines. The Document Options - Barlines dialog box appears.
- Deselect Final Barline at End of Piece.
- Click OK.
In Finale, a left barline refers to the first bar line of a system. In other words, only the first measure in a system has a left barline.
- Choose Document > Document Options > Barlines. The Document Options - Barlines dialog box appears.
- Choose Left barlines > Display on Single Staves and Display on Multiple Staves, as appropriate. Click OK.
- Choose the Measure tool .
- Double-click the measure you want to begin with a double barline. The Measure Attributes dialog box appears.
- In the Left Barline row, click the Double barline icon. Click OK. You return to your score, where Finale has drawn a double barline along the beginning of the system.
These instructions assume you want to insert a false barline in the middle of an existing measure. This method lets you create a barline of any thickness, size, or shape—curved, dotted, triple, or anything you can think up. You can also use Maestro or Engraver font characters at 24 pt for barlines. The \ character is a normal barline and the
- Choose the Expression tool
 and double-click the measure to which the barline will be attached. The Expression Selection dialog box appears.
 - Click Create. The Expression Designer dialog box appears.
- Select Shape and click Create. The Shape Designer appears.
If you want to change the thickness of the barline, use the Shape Designer > Line Thickness submenu. You can also specify the appearance of a dashed barline by choosing Shape Designer > Line Style > Dashed.
- Choose Shape Designer > Show > Grid and Staff Template.
- Choose the Line tool
 . Begin drawing on the origin (the small white circle at point 0,0). While pressing SHIFT, drag in the drawing area, straight down, until the V: text box says -24. You’ve just drawn a vertical line that's exactly the height of a staff (the SHIFT key constrains your mouse to perfectly vertical or horizontal lines).
 - Click OK to return to the Expression Designer.
- Deselect Allow Horizontal Stretching. This tells Finale that the Shape Expression you’ve just created should not be allowed to stretch horizontally along with the measures (when Finale widens measures slightly to make them flush with the page margins).
- Click OK, then Assign. The “barline” appears in the measure. Drag its handle to move it. Select its handle and press DELETE to remove it.
Group barlines
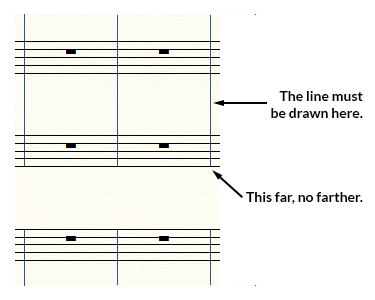
Grouped staves have an important characteristic: instead of drawing barlines only on the staves, the barlines can either be drawn through or between staves in a group. Make sure you’re in Scroll View before you begin (in case staves have been hidden).
- Choose the Staff tool . The Staff menu appears.
- Click a group handle to select it. If you haven’t yet created the group, do so now.
- Choose Staff > Group and Bracket > Edit. Or, double-click a group handle. The Group Attributes dialog box appears.
- Use the Draw Barlines
- Choose Only on Staves to draw the barline only within each staff, and not connect each staff with the barline.
- Choose Through Staves to draw a barline as one continuous line passing through all the staves in the group.
- Choose Only Between Staves (Mensurstriche) to draw a barline between staves, but not through the staff lines themselves.
- Click OK to confirm your barline settings.
There are several ways to draw or break barlines between every staff in a group. If you don’t want to draw the barlines through any staff on a group, use the Draw Barlines
- Choose the Staff tool . The Staff menu appears.
- Select the staff immediately below the desired break, then choose Staff > Edit Staff Attributes. Or, double-click a staff, staff handle, or staff name handle immediately below the desired break. The Staff Attributes dialog box appears.
- Click Break Barlines Between Staves, then click OK. The barline is no longer drawn continuously through the space above the staff you selected.
- Choose the Staff tool . The Staff menu appears.
- Click a group handle, then choose Staff > Group > Edit. (Or, double-click a group handle.) The Group Attributes dialog box appears. To display the attributes of another group, click the arrows at the top to select another Group ID number.
- To use an alternate barline style instead of the barline style originally defined in the Measure Attributes dialog box, select Use Alternate Group Barline, then select the barline style from the palette for the group.
- Click OK.
Working with barlines by region
Using this method, you can either change all barlines in a region to a specific type (such as an Invisible barline), or you can change barlines at regular intervals (for example, creating a double barline every eight measures).
- Choose the Measure tool , select the region you want to affect, and double-click the highlighted region. The Measure Attributes dialog box appears.
- Click to select the barline type you want. In the Change Every Measures text box, enter the frequency of barlines you want to change. In other words, to create a double barline every eight measures, select the double barline and enter 8 in the Change Every text box. (If you’re changing all barlines, leave a 1 in this text box.)
If you’re creating a part that will be extracted, you may also want to select Break a Multimeasure Rest (by clicking it twice), so that Finale breaks bars of rests at each double barline.
- Click OK (or press
Working with barlines globally (by document)
Noteman says: Finale "thinks" in terms of measures, even if you're creating a document with no barlines.
- Create the music normally (with barlines).
- Choose Document > Document Options and select Barlines.
- Deselect Display All Barlines.
- Click OK.
You may also want to hide any time signatures that appear in the document.
- Choose Document > Document Options, then select Barlines.
- Enter a new value in either the Heavy Line Thickness or the Thin Line Thickness text box. The units are whatever you’ve selected using
- Click OK (or press

