Tutorial 8: Other Notation Topics
In this section you’ll learn to use some of Finale’s most powerful scoring and notation tools.
The Special Tools Tool: Fancy Beaming and Stemming
The Special Tools Tool provides you with fine-tuning control over spacing, beaming, ties, dots, and stems.
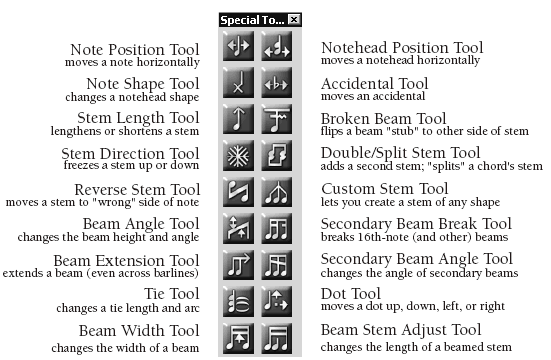
Using the Special Tools tool, you can edit
one measure of music at a time. To edit any of the above-listed musical
elements, click the appropriate tool on the palette, then click the measure
you want to edit. Finale will normally display a small square handle on
each note, stem, accidental, beam, tie, or dot (depending on which tool
you’re using—to hide these handles, deselect Show Handles in the Special
Tools Menu). Select the handle or handles of the elements you want to
manipulate, and perform the desired action. (You select multiple handles
by drag-enclosing or ![]() -clicking.)
-clicking.)
For a complete discussion of all Special Tools functions, consult the User Manual under Special Tools. For now, let’s try some experiments.
You can also change a notehead’s appearance:
Note, by the way, that this technique is best for occasional notehead shape changes. If you plan to create a rhythm part in which most of the noteheads are X’s or slashes, use the Staff Styles feature (see Staff Styles in the User Manual). You can also tell Finale where you want the stem to attach to one of these nonstandard noteheads. See Stem Connections dialog box in the User Manual.
Let’s try some other experiments.

Try it now:
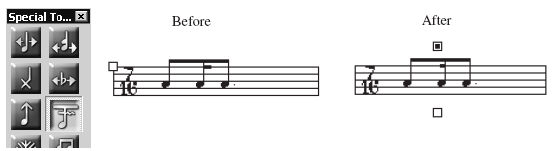
The note handles provide an additional feature. They can produce split stemming within a chord, giving the effect of a separate inner voice, like this:
There are two steps to creating this effect: First, click the bottom stem to let Finale know you want to create split stemming. Then click the handle of each note you want to be a part of the upper stem only.
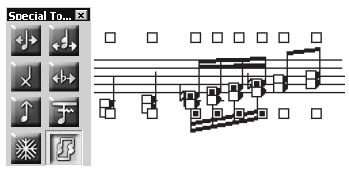
You may not use the next two tools as frequently, but it’s a good idea to keep their functions in mind; feel free to experiment as you read. The Reverse Stem Tool F simply flips the stem from one side of its notehead to the other, a function that may be useful in conjunction with cross-staff notes.

The Custom Stem Tool ![]() provides
great flexibility in special beaming cases—for example, splayed beaming,
where three mini-stems connect a C flat, C natural, C sharp chord cluster.
That’s only one function of the Custom Stem Tool. If you double-click
a note’s handle, you’ll enter the Shape Selection dialog box, from which
you can select a different shape (or create a new shape with the Shape
Designer, covered later in this tutorial) to use as a stem. See Stems
in the User Manual for full instructions in the use of these tools.
provides
great flexibility in special beaming cases—for example, splayed beaming,
where three mini-stems connect a C flat, C natural, C sharp chord cluster.
That’s only one function of the Custom Stem Tool. If you double-click
a note’s handle, you’ll enter the Shape Selection dialog box, from which
you can select a different shape (or create a new shape with the Shape
Designer, covered later in this tutorial) to use as a stem. See Stems
in the User Manual for full instructions in the use of these tools.
For a single stemless note, change the stem to a blank shape with the Custom Stem Tool.
Try it now: drag the right and left handles of the beam on the pair of eighth notes at the end of the measure.
Five tools provide additional control over
beaming. For example, the Secondary Beam Break Tool ![]() lets you specify places where you’d like secondary beams
(sixteenths, 32nds, and so on) to break. The Beam Extension Tool
lets you specify places where you’d like secondary beams
(sixteenths, 32nds, and so on) to break. The Beam Extension Tool ![]() simply extends any beam past its last note. And there’s also
a Secondary Beam Angle Tool
simply extends any beam past its last note. And there’s also
a Secondary Beam Angle Tool ![]() that lets you give sixteenth-note (and lower) beams different
slants. This tool is useful for creating the modern feathered beaming
notation of accelerandi and ritards, where several secondary beams converge.
The Beam Width Tool
that lets you give sixteenth-note (and lower) beams different
slants. This tool is useful for creating the modern feathered beaming
notation of accelerandi and ritards, where several secondary beams converge.
The Beam Width Tool ![]() lets you change the thickness of beams themselves; and the
Beam Stem Adjust Tool
lets you change the thickness of beams themselves; and the
Beam Stem Adjust Tool ![]() allows you to adjust the length of stems within beamed notes.
For a more complete discussion of these tools, see Special
Tools in the User Manual.
allows you to adjust the length of stems within beamed notes.
For a more complete discussion of these tools, see Special
Tools in the User Manual.
The Tie Placement Controls allow you to affect the vertical and horizontal points at which the tie starts and ends. The Tie Control Points offer you control over the shape of the tie. Note that under Tie Direction, Automatic is the default setting. This means that Finale decides which direction the tie should appear based on your settings in the Tie Options dialog box. For more details, see Tie Alterations dialog box in the User Manual.
To flip a tie with the Tie Tool, select
the tie’s handle and hit ![]() -F (Mac:
-F (Mac: ![]() -F)
-F)
The H offset is the horizontal distance between the dot and its default placement (a higher value means farther to the right); the V offset sets the vertical location of the dot relative to its default placement (a higher value means upward); the Inter-Dot Spacing sets the distance between the dots of a note with several dots. For example, if you decide that a dot should be moved down to the next space on the staff, add –.083 (inches) to the V offset. (You can determine which measurement units are used in most Finale text boxes. From the Edit Menu, choose Measurement Units.)
If you don’t like what you’ve done, click the
handle of the affected element (to select it), and press ![]() or
or ![]() . You can also erase Special Tools modifications
on a global basis: Select the desired region with the Selection Tool.
From the Edit Menu, choose Clear Selected Items. Click Uncheck All. Now
specify the Special Tools alterations you want erased, according to the
following table:
. You can also erase Special Tools modifications
on a global basis: Select the desired region with the Selection Tool.
From the Edit Menu, choose Clear Selected Items. Click Uncheck All. Now
specify the Special Tools alterations you want erased, according to the
following table:
|
To erase changes made with this tool |
Select this item in Items to Erase: |
|
Notehead Position Tool |
Notehead, Accidental, and Tablature String Alterations |
|
Note Shape Tool |
Notehead, Accidental, and Tablature String Alterations |
|
Accidental Tool |
Notehead, Accidental, and Tablature String Alterations |
|
Broken Beam Tool |
Stem and Beam Alterations |
|
Stem Length Tool |
Stem and Beam Alterations |
|
Custom Stem Tool |
Stem and Beam Alterations |
|
Beam Angle Tool |
Stem and Beam Alterations |
|
Secondary Beam Break Tool |
Secondary Beam Breaks |
|
Beam Extension Tool |
Beam Extensions |
|
Secondary Beam Angle Tool |
Stem and Beam Alterations |
|
Beam Width Tool |
Stem and Beam Alterations |
|
Beam Stem Adjust Tool |
Stem and Beam Alterations |
|
Tie Tool |
Dot and Tie Alterations |
|
Dot Tool |
Dot and Tie Alterations |
You can remove changes you’ve made with the Stem Direction, Double/Split Stem, and Reverse Stem tools using a slightly different method. Select the desired region with the Selection Tool. From the Utilities Menu, choose Utilities, then Use Default Direction.
In the real world, measures are sometimes numbered A, B, C, and D. Sometimes people cut sections out of music, resulting in a measure numbering sequence like 52, 53, 70. Other times music is inserted, and the bars are called 33a, 33b, 33c. For these situations, Finale can create several different numbering systems, one for each region of a piece.
In this example, however, you’ll simply number every measure sequentially. You’ll be using the Measure Tool.
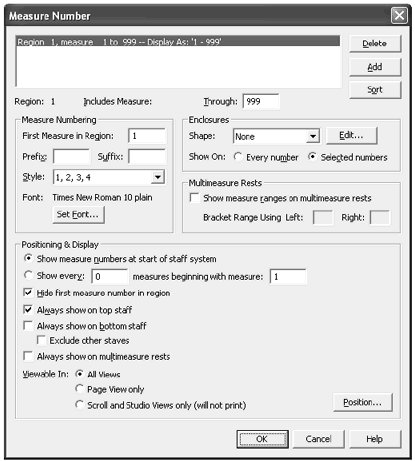
The text box at the top of this dialog box is currently empty, indicating that no measure number regions have been defined for this document. (The Tutorial 8.MUS file, that is. New default documents have a single measure number region by default starting with the first measure.)

If you want to add another region, or if you want to change some aspects of the numbering for this one, return to the Measure Number dialog box. For more details, see Measure Numbers in the User Manual.
Every now and then, you’ll run across a musical situation for which there’s no standard notation. Maybe you’ll want to insert a diagram into your score for harp pedaling, or musical-theatre staging, or an unusual instrument posture. For those situations, as well as for modern, alternative-notation scores, Finale has a built-in drawing program called the Shape Designer. You visited the Shape Designer in the previous tutorial, but this time you’ll really find out what it can do.
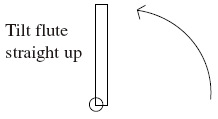
To acquaint you with its features, in this exercise you’ll create a special diagram as part of a note to your flutist.
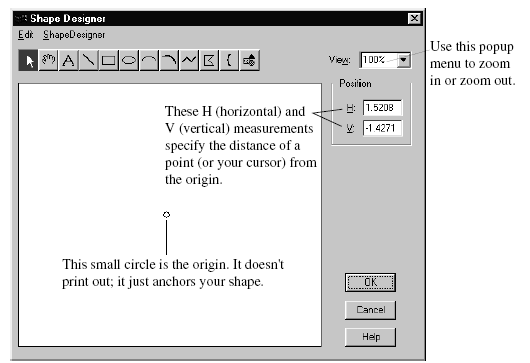
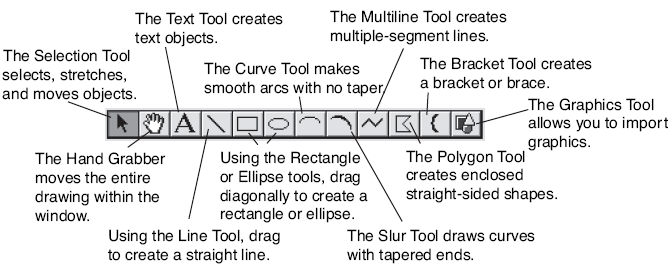
At the top of the window are twelve drawing tools.
Let’s say that you want a special effect—you want the flute rotated 90 degrees and played vertically.
In the steps below, the units shown in the H: (horizontal coordinate) and V: (vertical coordinate) text boxes are measured in points (72 per inch).
![]()
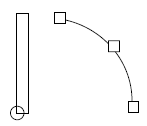
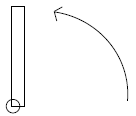
In the next step, you’ll create a curved arrow to indicate that you want a rotation.
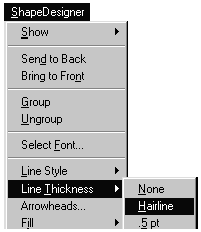
To change its line thickness, click the line once and then, from the Shape Designer Menu, choose Line Thickness and then select a different thickness.
Next, you’ll add an arrowhead to the curve.
If you want to preserve the spatial relationship
between the curve and the rectangle, you can group them into a single
unit. With the Selection Tool, click one object, then ![]() -click
the other. From the Shape Designer Menu, choose Group. From now on, these
two objects will be locked together as though they’re a single object—until
you choose Ungroup from the Shape Designer Menu, of course.
-click
the other. From the Shape Designer Menu, choose Group. From now on, these
two objects will be locked together as though they’re a single object—until
you choose Ungroup from the Shape Designer Menu, of course.
As a final step, make a textual notation to the hapless flutist:
You may not have much everyday need for the vertical-flute shape you just drew. But the Shape Designer will come in handy for creating doits, harp diagrams, enclosures, logos, and other special notational cases. For more information on using the Shape Designer, see Shape Designer in the User Manual.
Finale offers a variety of ways for you to scan sheet music and bring the results into Finale. You can bring your scanned files into Musitek’s MIDISCAN or SmartScore software, then import the resulting files into Finale. Or, you could directly acquire sheet music from your scanner, and translate it to a Finale file using built-in SmartScore technology. The SmartScore Lite feature in Finale, like many music scanning products, doesn’t recognize articulation marks, hairpins, double or repeat barlines, or text. It will recognize 3 accidental types, 3 clefs, 16 staves per page, smallest note value is a 32nd note, and a maximum of 1 augmentation dot.
Because scanning is not a perfect science, you will need to clean up any file after conversion. Depending on the music, some users will find it easier to simply re-enter the music via one of Finale's traditional note entry methods: Simple Entry, Speedy Entry, or HyperScribe.
We encourage you to respect all copyrights.
Remember that to take advantage of any of Finale's scanning capabilities, you will need to have a properly installed scanner (contact the manufacturer of your scanner if you have questions). Because scanners and scanning software varies widely, we cannot provide instructions on how to prepare a file for every scanner. For some hints on how to prepare a scanned file from some popular scanners, see Scanning in the User Manual. The scanned sheet music image should be saved as a grayscale graphic in an uncompressed TIFF format at a resolution of 300dpi.
You can also import a .FIN file you have saved in SmartScore Pro. Here’s how:
For both the converted TIFF and SmartScore file, you may wish to copy and paste the music into a new Wizard-created document for a fast improvement in layout.
For more information, see Scanning in the User Manual.
One of the more powerful aspects of Finale is Percussion Mapping. In General MIDI, each percussion sound is assigned to a MIDI pitch (i.e. MIDI Note 36 is a bass drum sound). Percussion Mapping allows you to map any MIDI note to any staff position.
Suppose you wish to create a score for your drum set player and you are interested in both how the score looks and plays back.
Because different drum instruments will often appear on the same staff but with different rhythms, you’ll need to use layers for each instrument appearing at the same time. For example, you’d normally notate the bass drum rhythms on the same staff as the snare drum.
Sometimes, two different sounds appear on the same line or space in the staff. For example, click in the third space of the staff, to enter a snare drum hit. Instead of the snare, you probably heard a side stick sound instead of a snare drum. Simple solution: press numeric keypad -(minus). Click on the note in question. You should now hear a snare drum sound.
As an exercise, let’s enter the following passage:
For more information, see the User Manual under Percussion.
When You’re Ready to Continue
If you worked through all of the Finale tutorials, congratulations! You’ve seen all of Finale’s major features at work. Now begin a project of your own. Read the last chapter of this book for some tips, and remember that the User Manual and QuickStart Video Tips are available under the Help Menu.
![]()
